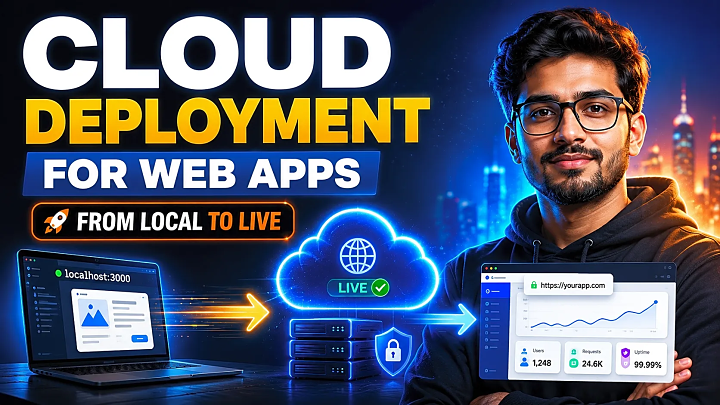
Cloud Deployment Guide for Web Applications: From Localhost to Production
Deploy a frontend, backend, database and custom domain using a practical, student-friendly production workflow.
A web application can run perfectly on your laptop and fail as soon as it reaches the cloud. The build command may be wrong. The server may listen only on localhost. Environment variables may be missing. The database may block external connections, or uploaded files may vanish after the next restart.
That gap between “it works locally” and “it works reliably online” is what cloud deployment solves.
Cloud deployment is the controlled process of preparing an application, provisioning its services, releasing it safely, securing public access, verifying production behaviour and preserving a rollback path. For students, the objective is a repeatable and understandable deployment—not enterprise-scale infrastructure.
Quick Answer: How Do You Deploy a Web Application to the Cloud?
To deploy a web application successfully:
- Identify the frontend, backend, database, file-storage and background-job requirements.
- Choose static hosting, a managed platform, managed containers or a virtual machine.
- Move configuration and secrets outside the source code.
- Create persistent database and object-storage services.
- Connect the repository to a staging environment.
- Run tests, builds and database migrations.
- Configure DNS, HTTPS, health checks, logs and alerts.
- Verify every major user workflow.
- Promote the release to production and retain a rollback option.
For most student web applications, a managed platform is the best starting point because it removes much of the operating-system, reverse-proxy and server-maintenance work.
What Is Cloud Deployment?
Cloud deployment means running an application on internet-accessible computing resources supplied by a cloud provider. The provider may manage hardware, operating systems, runtimes, networking or scaling, while you remain responsible for code, data, configuration and permissions.
A typical full-stack cloud architecture looks like this:
User → DNS → HTTPS/CDN or load balancer → application service → managed database
Optional services may include object storage for uploads, Redis for caching or sessions, a queue worker for background tasks and an email or OTP provider.
Production success means that authentication, CRUD operations, uploads, integrations and error handling work outside the developer’s laptop.
Choose the Right Cloud Deployment Model
|
Deployment model |
Best for |
Setup effort |
Persistent storage |
Main limitation |
|
Static hosting |
HTML/CSS/JS, React or Vue frontend |
Low |
External services required |
Cannot run a conventional backend |
|
Managed PaaS |
Node.js, Django, Flask, PHP, Java or .NET apps |
Low–medium |
Managed database/object storage |
Less operating-system control |
|
Managed containers |
Dockerized APIs and portable services |
Medium |
External persistent services |
Requires container knowledge |
|
Virtual machine/VPS |
Custom, legacy or OS-dependent stacks |
High |
You configure it |
Security and maintenance burden |
|
Kubernetes |
Multiple independently deployed services |
Very high |
Cluster-dependent |
Excessive for most single projects |
Use static hosting for a frontend-only project. Choose managed PaaS for a conventional backend and database. Use managed containers when the application already has a reliable Dockerfile or portability is a learning objective. Choose a VM only when the stack requires operating-system access. Kubernetes is usually unjustified for one academic web application.
Managed container platforms such as Cloud Run accept container revisions, provide HTTPS service endpoints and expose configuration for ports and startup commands. A Practical Full-Stack Deployment Blueprint
Consider a common project with:
- React frontend
- Node.js or Django backend
- PostgreSQL database
- user-uploaded images
- GitHub repository
- custom domain
A sensible architecture is:
- deploy the React build to static hosting;
- deploy the API to a managed web or container service;
- use managed PostgreSQL;
- store uploads in object storage rather than the application disk;
- keep secrets in the platform’s protected configuration;
- allow the frontend origin through a restricted CORS policy;
- expose /health for automated health checks;
- send deployment logs and application errors to a monitoring system.
Step-by-Step Cloud Deployment Guide
Step 1: Audit the Application
Record the runtime version, dependency file, build command, start command, required port, database engine, environment variables, upload paths, scheduled tasks and external APIs.
Run a clean clone using only the README. If it works only on the original laptop, the setup is not reproducible.
Step 2: Prepare Production Configuration
Remove hard-coded passwords, machine-specific paths and localhost URLs. Create an .env.example containing variable names but no real secrets.
APP_ENV=production
DATABASE_URL=
SESSION_SECRET=
FRONTEND_URL=
STORAGE_BUCKET=
Lock dependency versions, define a production start command and make the server listen on the host and port expected by the platform. Container platforms commonly supply the listening port through configuration, so the application should not assume a fixed local port.
Step 3: Separate Persistent Data
Instances can restart, scale or be replaced, so do not treat local disk as permanent. Store business data in a managed database, uploads in object storage and shared sessions in an external store. Enable backups and confirm the restoration process.
Step 4: Select the Platform and Region
Choose a region based on user proximity, service availability, budget and data requirements. For an India-focused demonstration, a nearby supported region is usually preferable.
Match the platform to the workload rather than selecting it only because a tutorial used it.
Step 5: Connect Git and Create Staging
Connect the repository and deploy a non-production branch first. Keep development, staging and production configuration separate.
A basic CI/CD pipeline should:
- install dependencies;
- run linting and tests;
- build the application;
- produce a versioned artifact or container image;
- deploy to staging;
- run smoke tests;
- require approval before production when appropriate.
GitHub deployment environments can restrict deployment branches, enforce protection rules and control when production secrets become available to a job. Step 6: Run Database Migrations Safely
Treat schema changes as an explicit release step and back up important data before risky migrations.
For safer changes, add the new structure first, deploy compatible code, migrate existing data and remove obsolete fields in a later release.
Step 7: Configure Domain, HTTPS and Security
Connect the domain through DNS, enable HTTPS and redirect HTTP traffic. Restrict administrative routes, validate inputs, limit CORS to approved origins, use secure cookies and give each cloud resource only the permissions it requires.
Never commit production credentials to Git or display them in screenshots. Secrets should be centrally managed, access-controlled, audited and rotated where necessary. OWASP specifically recommends managing the complete secrets lifecycle rather than leaving secrets in source code or unmanaged files. Step 8: Verify the Complete Production Workflow
Test from another device or mobile network:
- registration and login;
- role permissions;
- create, read, update and delete operations;
- uploads and downloads;
- email or OTP flows;
- database migrations;
- error pages;
- HTTPS redirects;
- API CORS behaviour;
- the health endpoint.
Step 9: Monitor and Preserve Rollback
Monitor deployment status, logs, error rate, response time, resource usage and database connectivity. Retain the previous working release so the new version can be checked and reversed safely.
AWS documents rolling, immutable and traffic-splitting deployment policies, while Azure App Service supports deploying to staging slots and swapping a tested version into production. Deployment Strategies Compared
|
Strategy |
How it works |
Advantage |
Main risk |
|
Recreate |
Stop the old version and start the new one |
Simple |
Temporary downtime |
|
Rolling |
Replace instances gradually |
Lower downtime |
Two versions may overlap |
|
Blue-green |
Switch traffic between two environments |
Fast rollback |
Higher temporary cost |
|
Canary |
Send limited traffic to the new release |
Limits exposure |
Requires monitoring and traffic control |
For most student applications, staging followed by controlled production promotion is sufficient.
Cloud Deployment Troubleshooting Matrix
|
Symptom |
Likely cause |
What to inspect |
Typical fix |
|
App builds but will not start |
Wrong start command |
Runtime logs |
Add the correct production command |
|
App is unreachable |
Wrong host or port binding |
Startup logs |
Bind to 0.0.0.0 and the platform port |
|
Database connection fails |
Incorrect secret or network rule |
Connection logs |
Correct the URL and access policy |
|
Uploads disappear |
Ephemeral local disk |
Storage path |
Move files to object storage |
|
Frontend cannot call API |
CORS or HTTPS mismatch |
Browser console |
Correct the allowed origin and API URL |
|
Login fails only in production |
Cookie or proxy settings |
Response headers |
Use secure, proxy-aware cookie settings |
|
Linux build fails |
Case-sensitive import path |
Build output |
Correct filename casing |
|
New release breaks production |
Migration or configuration mismatch |
Deployment difference |
Roll back and restore compatible configuration |
Cost and Budget Controls
Cost depends on compute, database, storage, bandwidth, backups and region. Because free allowances and student programmes change, verify current pricing and:
- set a monthly budget alert;
- shut down unused test resources;
- understand whether inactive services sleep;
- check database and backup charges separately;
- monitor outbound bandwidth;
- delete unattached disks, addresses and old environments;
- avoid oversizing resources for a short demonstration.
What to Include in a Project Report
Document the architecture, selected deployment model, provider rationale, environment-variable design, build and start commands, database migration process, security controls, screenshots, test evidence, monitoring, limitations and rollback procedure.
Add a labelled architecture diagram and redacted logs or health-check evidence. Do not fabricate performance results.
Frequently Asked Questions
Which cloud platform is best for a student web application?
There is no universal best provider. Compare runtime support, database requirements, deployment complexity, regional availability, documentation and budget. A managed application platform is usually the easiest choice for a conventional student project.
Can the frontend and backend be deployed separately?
Yes. A React or Vue frontend can use static hosting while a Node.js, Django or Flask API runs on a managed backend service. Configure the production API URL, CORS, HTTPS and environment variables correctly.
Do I need Docker?
No. Many managed platforms deploy directly from source. Docker is useful for runtime consistency, portability and custom system dependencies, but it adds another layer to build and troubleshoot.
How should I deploy the database?
Prefer a managed database. Use a restricted application account, keep the connection string in protected configuration, enable backups and run version-controlled migrations.
Why does my application work locally but fail in the cloud?
Common causes include missing variables, an incorrect start command, unsupported runtime versions, binding only to localhost, blocked database access, case-sensitive file paths and reliance on temporary local storage.
How do I deploy updates without breaking the live application?
Deploy to staging, run smoke tests, use backward-compatible migrations and promote a versioned release. Keep the previous version and configuration available for rollback.
What should I show during a project demonstration?
Show the live URL, HTTPS, login roles, main workflows, database persistence, upload behaviour, deployment logs, the health endpoint and the rollback or recovery plan.
Conclusion
Cloud deployment turns a local project into a system that other people can access and evaluate. The provider logo matters less than whether the deployment is repeatable, secure, observable and understandable.
Start with the simplest managed model that supports the complete application. Externalize configuration, use persistent services, deploy through source control, test in staging, protect secrets, verify every important workflow and preserve a rollback path. Add containers, autoscaling, load balancing or Kubernetes only when the project requirements justify the additional operational complexity.
The remaining E-E-A-T enhancement is operational rather than editorial: add genuine screenshots, logs, provider settings and a named technical reviewer only after the deployment has actually been tested.